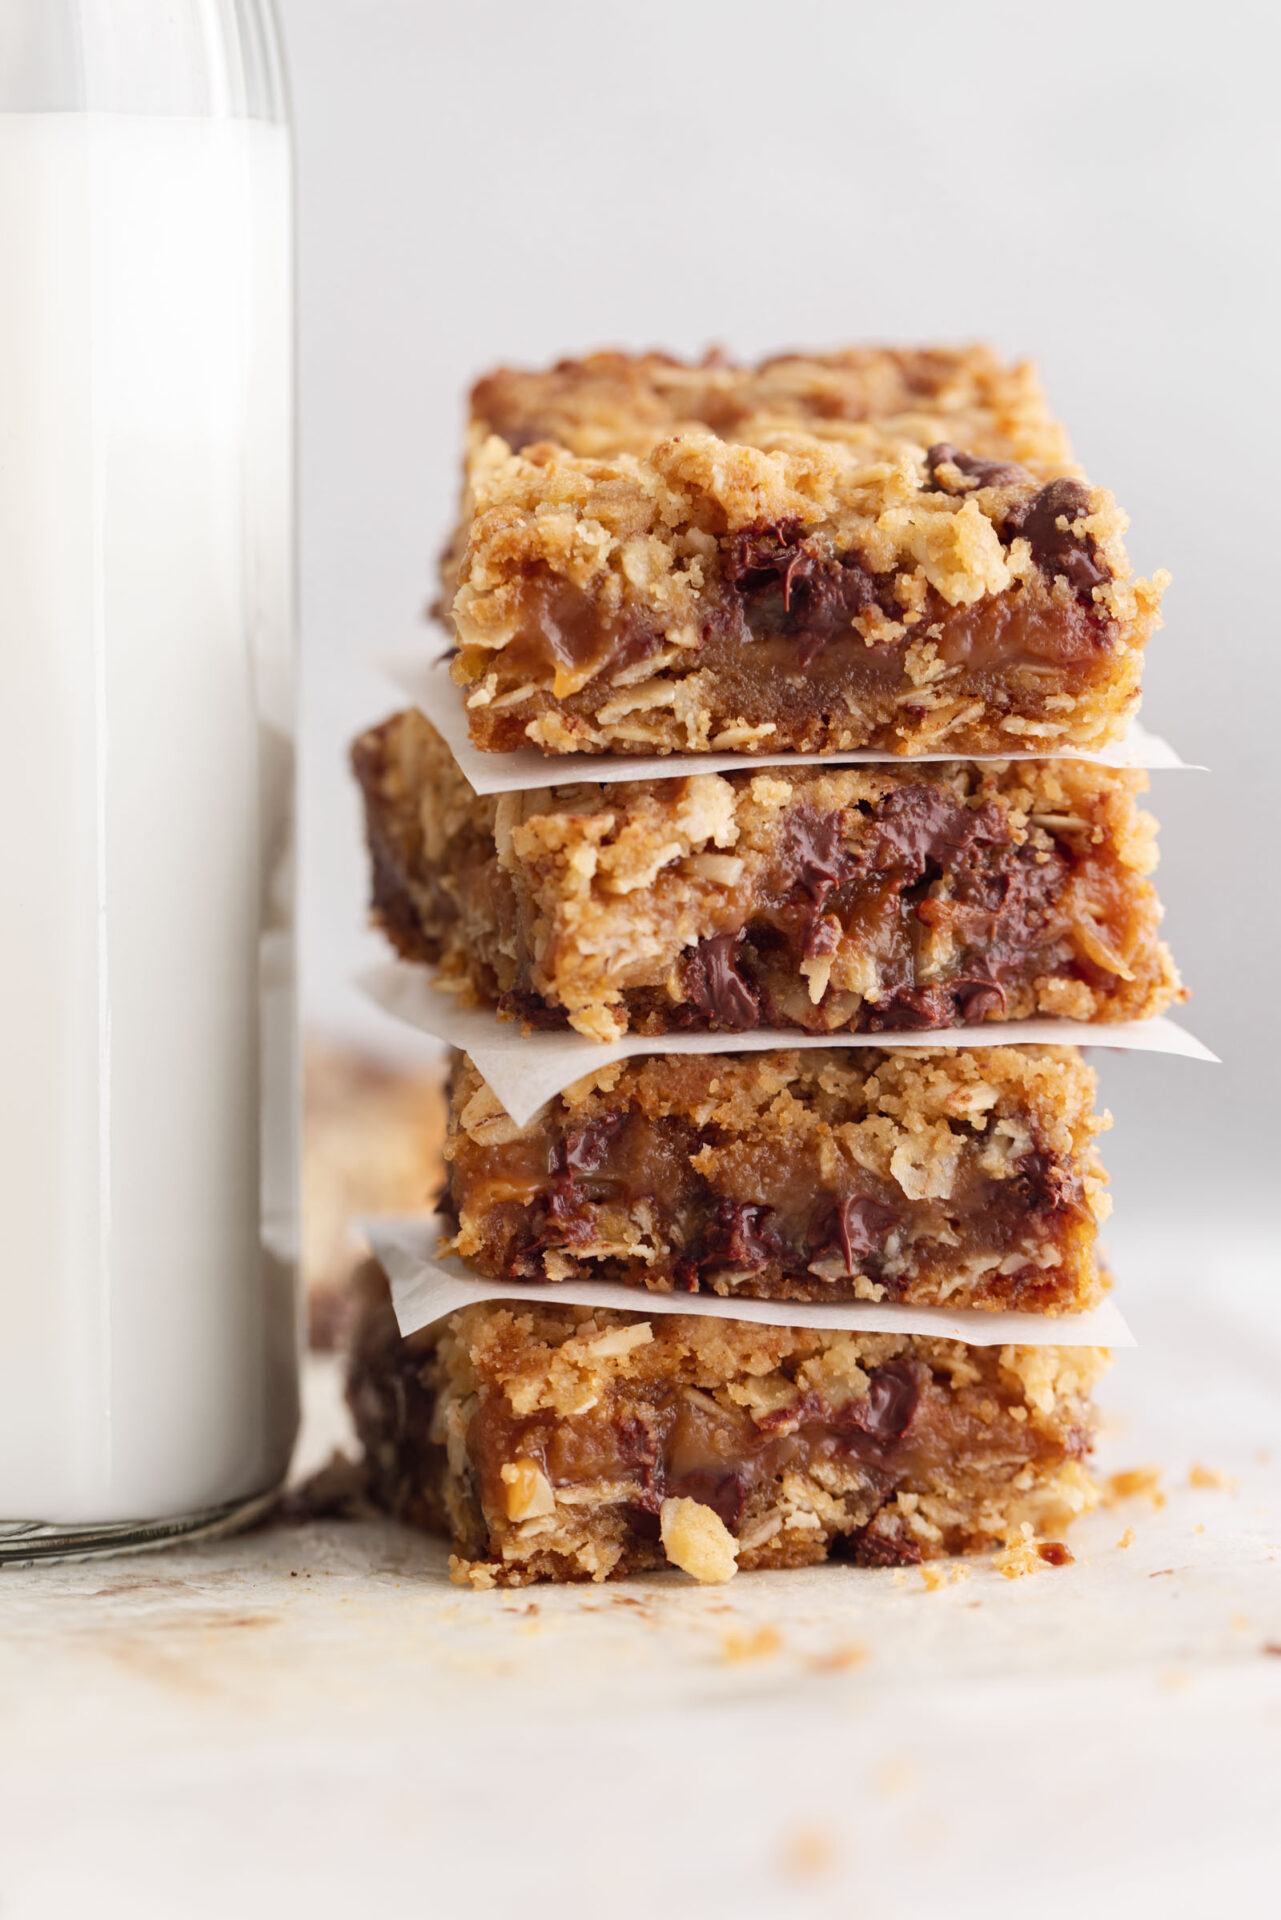
Carmelitas are the ultimate dessert chocolatey, and caramel-filled treats! These oatmeal caramel bars are packed with layers of buttery oat crumble, rich chocolate, and silky caramel, making them one of the most irresistible baked goods you’ll ever try.
This recipe, inspired by Broma Bakery, takes Carmelitas to the next level by using high-quality ingredients and the perfect balance of flavors and textures. In this post, we’ll cover everything you need to know about making the greatest Carmelitas, including ingredients, step-by-step instructions, baking tips, and delicious variations.
Let’s dive into the world of gooey caramel goodness!
Why You’ll Love This Recipe
✔ Easy to Make – Only 15 minutes of prep time before baking.
✔ Rich & Gooey Texture – A perfect balance of chewy, crunchy, and soft layers.
✔ Chocolate & Caramel Heaven – A delightful mix of melted chocolate and creamy caramel.
✔ Make-Ahead Friendly – These bars taste even better the next day!
✔ Perfect for Any Occasion – Great for dessert, bake sales, parties, or gifting.
Ingredients for The Greatest Carmelitas
This easy dessert recipe uses simple ingredients to create an unforgettable treat.
For the Oat Crumble Layer:
- 1 cup all-purpose flour
- 1 cup old-fashioned oats
- ¾ cup brown sugar (light or dark)
- ½ teaspoon baking soda
- ¼ teaspoon salt
- ¾ cup unsalted butter, melted
For the Caramel Layer:
- 1 cup caramel sauce (store-bought or homemade)
- ¼ cup heavy cream
For the Chocolate Layer:
- ¾ cup semi-sweet chocolate chips (or chopped chocolate)
- ½ cup chopped pecans (optional, for crunch)
Step-by-Step Instructions for Making Carmelitas
Step 1: Preheat & Prepare the Pan
- Preheat your oven to 350°F (175°C).
- Line an 8×8-inch baking dish with parchment paper, leaving an overhang for easy removal.
Step 2: Make the Oat Crumble Mixture
- In a mixing bowl, whisk together flour, oats, brown sugar, baking soda, and salt.
- Pour in the melted butter and mix until combined. The texture should be crumbly but moist.
Step 3: Bake the First Layer
- Press half of the oat mixture evenly into the bottom of the prepared pan.
- Bake for 10 minutes until lightly golden.
Step 4: Prepare the Caramel Filling
- In a small saucepan, warm caramel sauce and heavy cream over low heat.
- Stir until smooth and well combined. Remove from heat.
Step 5: Assemble the Carmelitas
- Sprinkle chocolate chips evenly over the baked oat crust.
- Pour the warm caramel sauce over the chocolate layer.
- If using, sprinkle chopped pecans on top for added crunch.
- Crumble the remaining oat mixture evenly over the caramel layer.
Step 6: Bake Again
- Return the pan to the oven and bake for 18-20 minutes until the top is golden brown.
- The caramel will be bubbling – this is normal!
Step 7: Cool Completely
- Allow the Carmelitas to cool in the pan for at least 2 hours before cutting.
- For cleaner slices, refrigerate for 30 minutes before slicing.
Expert Tips for the Best Carmelitas
✔ Use High-Quality Caramel – A thick, rich caramel sauce ensures the best texture.
✔ Chill Before Slicing – This makes cutting easier and prevents the caramel from oozing out.
✔ Don’t Overbake – The bars will continue setting as they cool.
✔ Customize the Chocolate – Try dark, milk, or white chocolate for a fun twist.
✔ Add a Sprinkle of Sea Salt – Enhances the caramel flavor and adds a gourmet touch.
Delicious Variations to Try
Want to switch things up? Here are some fun variations on the classic Carmelitas:
1. Peanut Butter Carmelitas
- Add ¼ cup peanut butter to the caramel layer for a nutty twist.
2. Salted Caramel Dark Chocolate Bars
- Use dark chocolate chips and top with flaky sea salt for a sophisticated version.
3. Gluten-Free Carmelitas
- Swap the all-purpose flour with gluten-free oat flour for a GF-friendly treat.
4. Nutty Pecan Carmelitas
- Add ½ cup chopped pecans or walnuts for extra crunch and flavor.
5. Espresso Chocolate Carmelitas
- Stir 1 teaspoon espresso powder into the chocolate chips for a mocha-inspired treat.
Frequently Asked Questions (FAQs)
1. Can I Make Carmelitas Ahead of Time?
Yes! These bars taste even better the next day after the flavors meld together. Store them at room temperature for up to 3 days or refrigerate for up to a week.
2. Can I Freeze Carmelitas?
Absolutely! Wrap them tightly in plastic wrap and freeze for up to 2 months. Let them thaw at room temperature before serving.
3. What’s the Best Caramel Sauce for This Recipe?
A thicker, high-quality caramel sauce works best. If using store-bought caramel, choose one that is rich and creamy, not too thin.
4. Can I Double This Recipe?
Yes! Simply double the ingredients and bake in a 9×13-inch pan. Increase the baking time by 5-7 minutes.
5. What Can I Serve with Carmelitas?
- Vanilla ice cream for a classic pairing.
- Whipped cream for a light, airy topping.
- Drizzle of extra caramel for more gooey goodness.
Final Thoughts
These Greatest Carmelitas from Broma Bakery are rich, gooey, and packed with irresistible flavors. Whether you’re making them for a special occasion, bake sale, or just a weekend treat, they’re guaranteed to be a hit!
Try this easy dessert recipe and let us know how it turned out in the comments below. Happy baking! 🍪✨


